
INSTALLATION Smart OBD E5 Diagnostic switch Honda
Installation
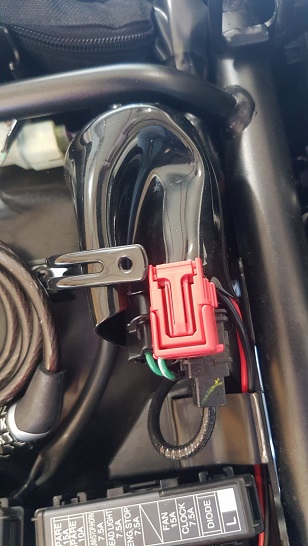
Step 1 : Locate the diagnostics port located under the seat. It is a red 6-Pin connector and has a red dust cap on it.
Step 2 : Remove the dust cap and connect the Smartmoto Sealer Mode Switch connector.
Step 3 : Install the waterproof installation kit on the switch body.
Step 4 : Find a suitable place on the motorcycle to secure the switch or install it through a 6mm hole on a panel using the switch rubber boot to secure it.
DMT-004 DTC Readout
Step 1 : Turn the Dealer Mode Switch ON.
Step 2 : Turn the ignition ON.
Step 3 : Note the MIL blinking pattern to read the DTC code.
DMT-004 Stored DTC Erase
Step 1 : Turn the Dealer Mode Switch ON.
Step 2 : Turn the ignition ON.
Step 3 : After the startup Fi check turn the Dealer Mode Switch OFF position and immediately ON while the MIL stays ON for about 5 seconds (reset receiving pattern).
Step 4 : The stored DTC is erased if the MIL goes off and starts blinking (successful pattern).
• The DLC must be jumped while the MIL light is ON. If not, the MIL will not start blinking. In that case, turn the ignition switch OFF and try again.
• Note that the self-diagnostic memory cannot be erased if the ignition switch is turned OFF before the MIL starts blinking.